ساعة ذكية محلية الصنع

ساعة ذكية محلية الصنع

مقدمة

الساعات الذكية تعتبر من الأجهزة المثيرة للإعجاب نظراً لما توفره من مميزات في حجم صغير، ولكن ما الذي يجعل الساعة الذكية رائعة بالفعل؟ بلا شك هو مظهرها وخصائصها، حيث أن تصميم وبناء ساعتك الذكية بنفسك يعتبر أفضل طريقة للحصول على مميزات مخصصة تناسب احتياجاتك.

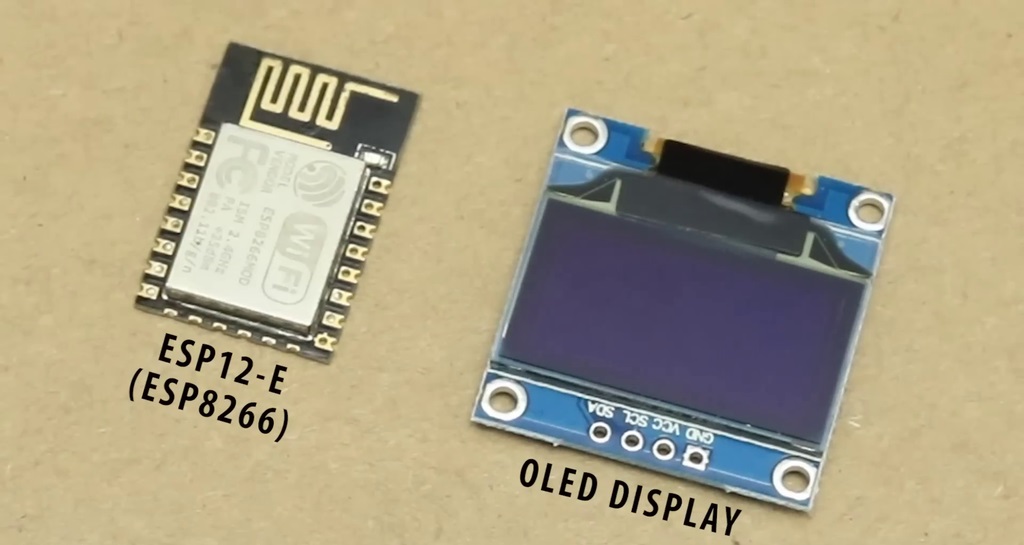
في هذا المشروع سأوضح كيفية صنع ساعة ذكية بنفسك باستخدام شريحة ESP8266 من نوع ESP-12E، فقد دونت كل الخطوات بالتفصيل.

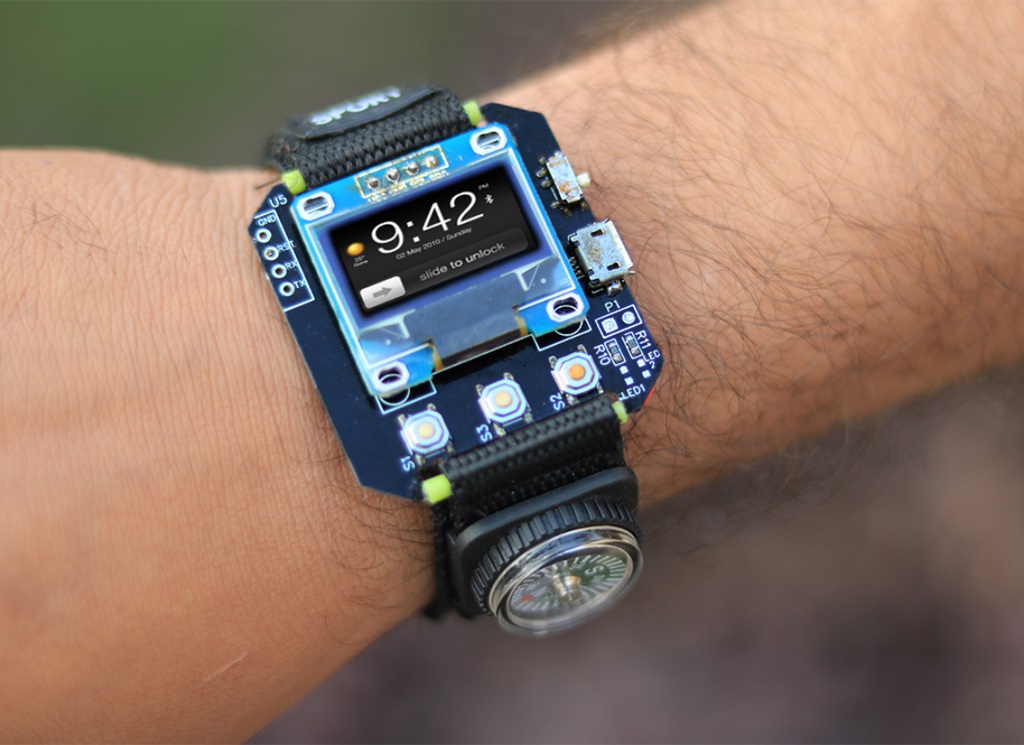
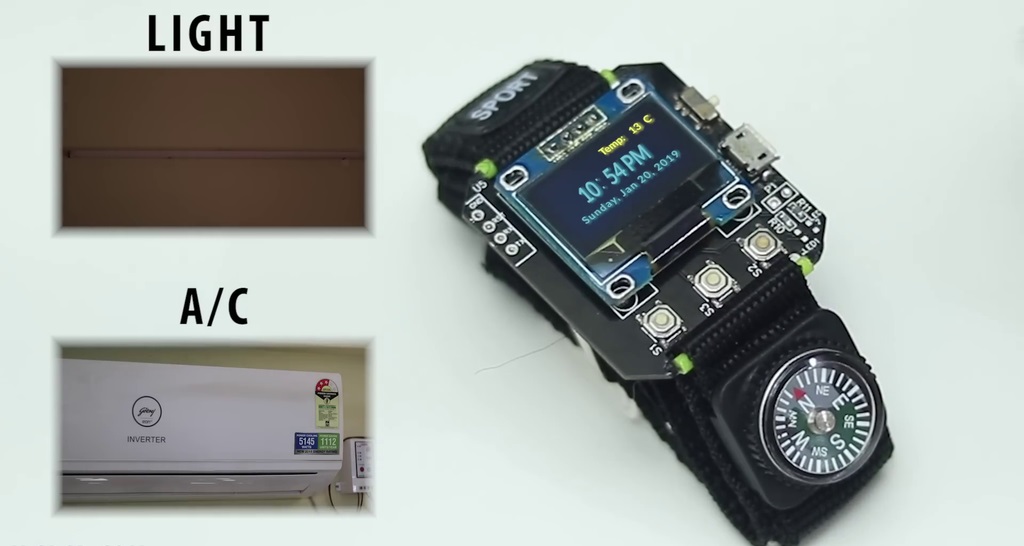
تقوم الساعة بتسجيل الوقت وتعيين الطقس وتسجيله، والأهم من ذلك القدرة على التحكم في بعض الأجهزة الأخرى، وذلك باستخدام الأزرار الموجودة بها (وهي ميزتها الرئيسية)، ويجب أن تكون الساعة مرتبطة بالإنترنت للحصول على جميع البيانات المطلوبة

وهذه هي الطريقة التي تعمل بها الساعة:

  1. الوقت: تقوم الساعة بالاتصال بأقرب خادم NTP للحصول على الوقت والتاريخ.
  2. الطقس: من خلال واجهة Yahoo Weather API تحصل الساعة على بيانات درجة الحرارة.
  3. تشغيل الأجهزة الأخرى عن بعد: من خلال الاتصال بخادم Blynk يمكن للساعة استخدام ميزة التوصيل بينها وبين الأجهزة الأخرى للتحكم مباشرة في وحدة ESP8266 Relay أخرى.

لوازم

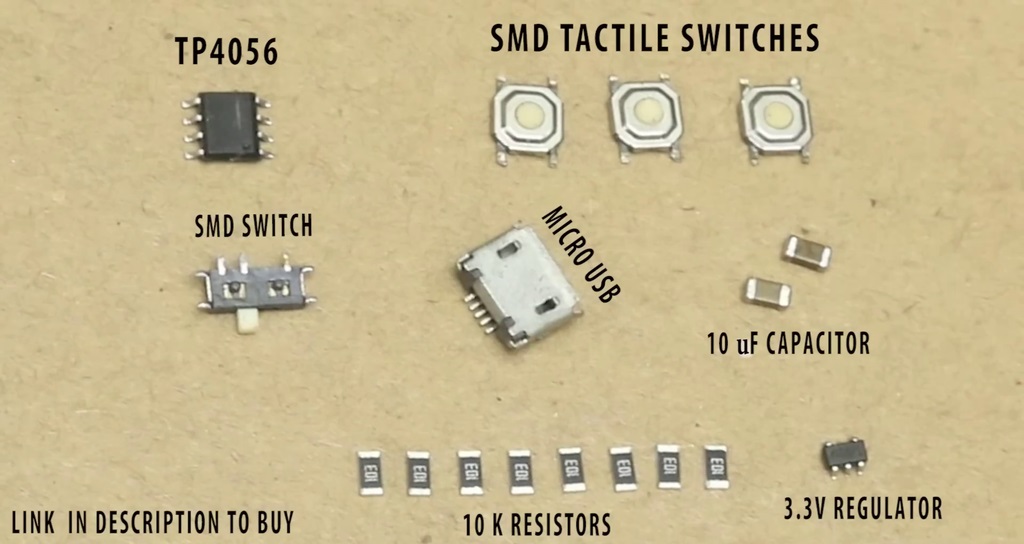
لصنع ساعة ذكية نحتاج إلى المواد التالية:

  • عدد 1 شريحة ESP-12e
  • عدد 1 شاشة OLED.
  • عدد 3 أزرار SMD.
  • عدد 1 منظم جهد 3.3V: (يمكن الحصول عليه من Arduino Uno أو Pro Mini)
  • عدد 1 وحدة TP4056.
  • عدد 2 أزرار SMD صغيرة.
  • عدد 2 مصباح 0603 LED.
  • عدد 2 مقاوم 0603.
  • عدد 1 مفتاح منزلق SMD.
  • عدد 8 قطع مقاومات 0805 10K.
  • عدد 2 مكثف 0805 10uF.
  • عدد 1 مقاوم 0603 112.
  • مكواة لحام.
  • بطارية ليبو 3.3 فولت (ليثيوم بوليمر).

خطوة 1 : الحصول على لوحة الدوائر المطبوعة PCB

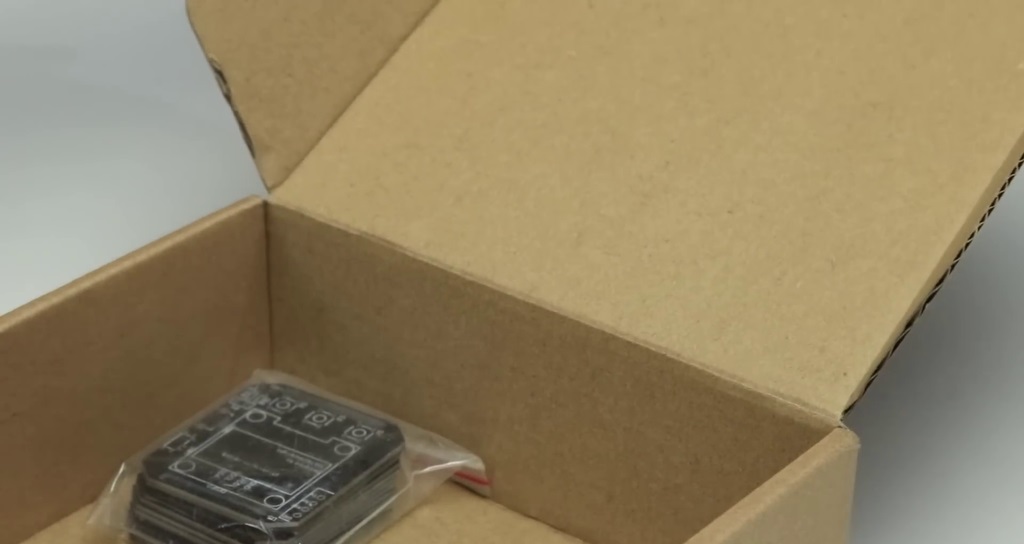
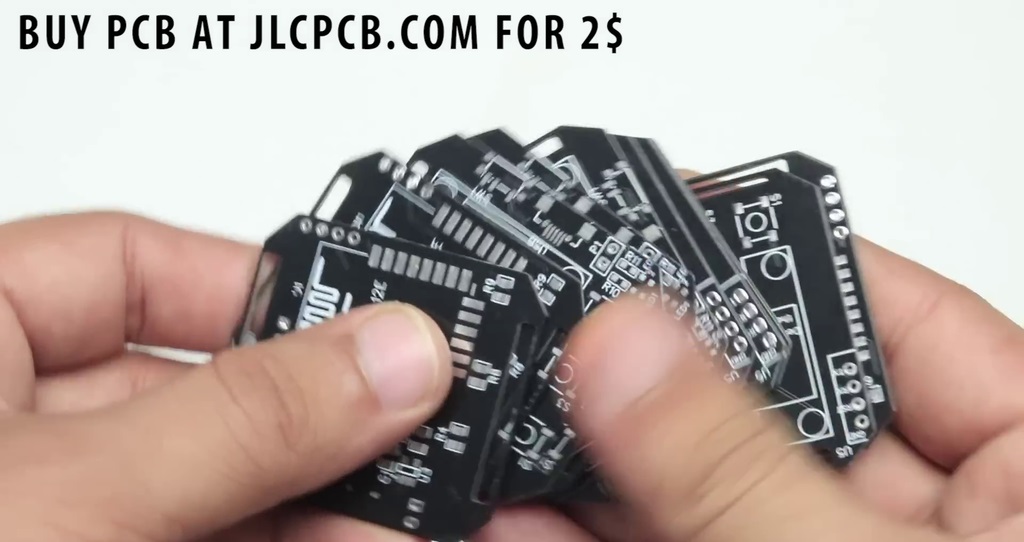
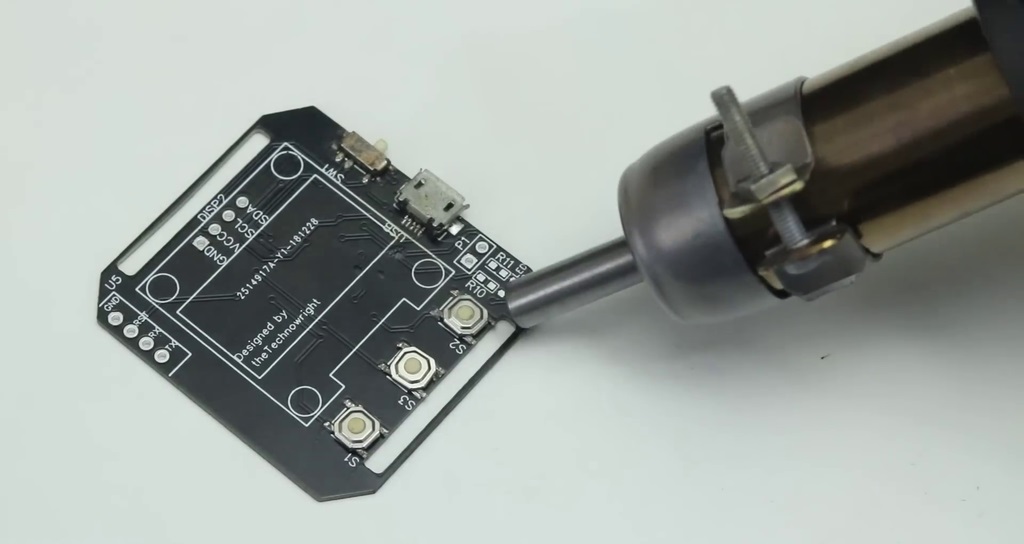
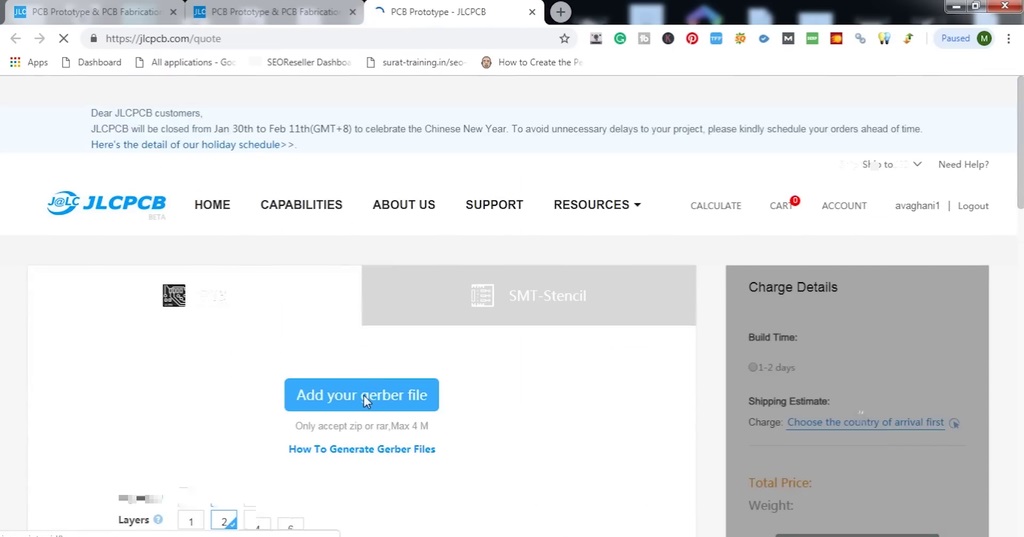
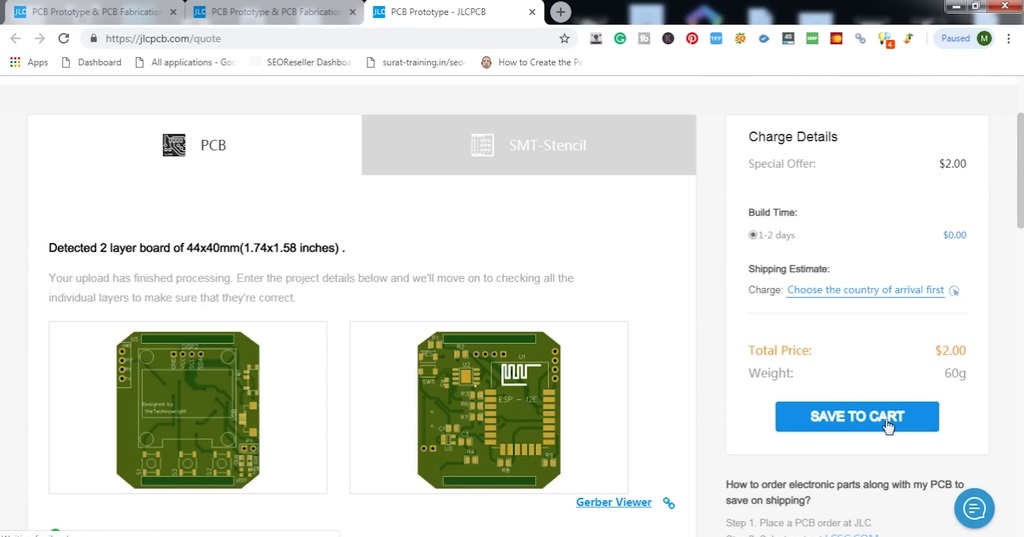
لم أود أن تكون تلك الساعة ضخمة أو ثقيلة بل وددت أن تكون خفيفة، لذلك قررت استخدام لوحة دوائر مطبوعة (PCB) تساعدني في استخدام أسلاك أقل وطريقة تقفيل مريحة، وقمت بتصميم المخطط واللوحة باستخدام برنامج EasyEDA ثم طلبت تصنيعها من موقع JLCPCB.

ويمكنك الحصول على ملف Gerber للوحة (PCB) من هنـــا.

كما يمكنك تصميم لوحة دوائر مطبوعة (PCB) مكونة من طبقتين من JLCPCB.com باتباع الخطوة التاسعة.

خطوة 2 : لحام المكونات ببعضها

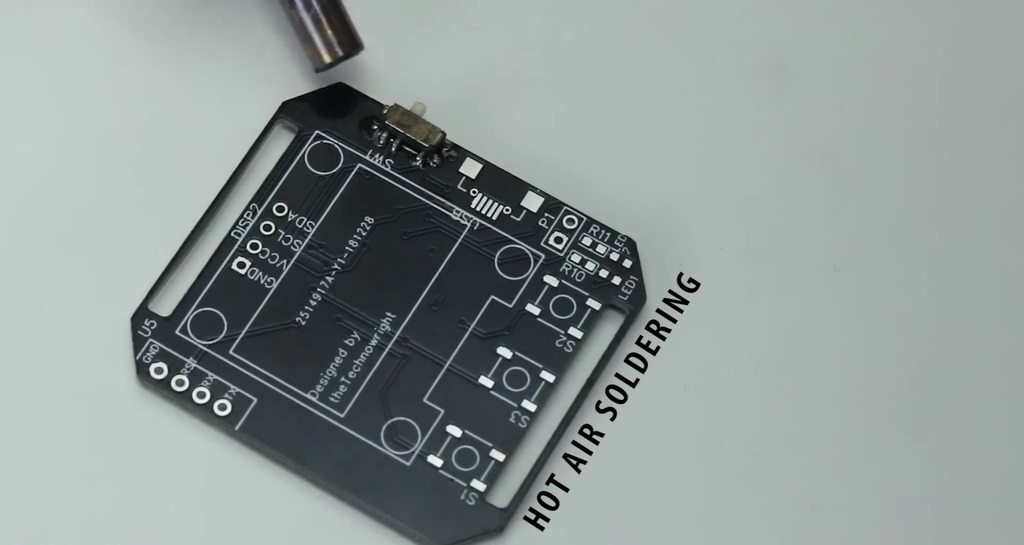
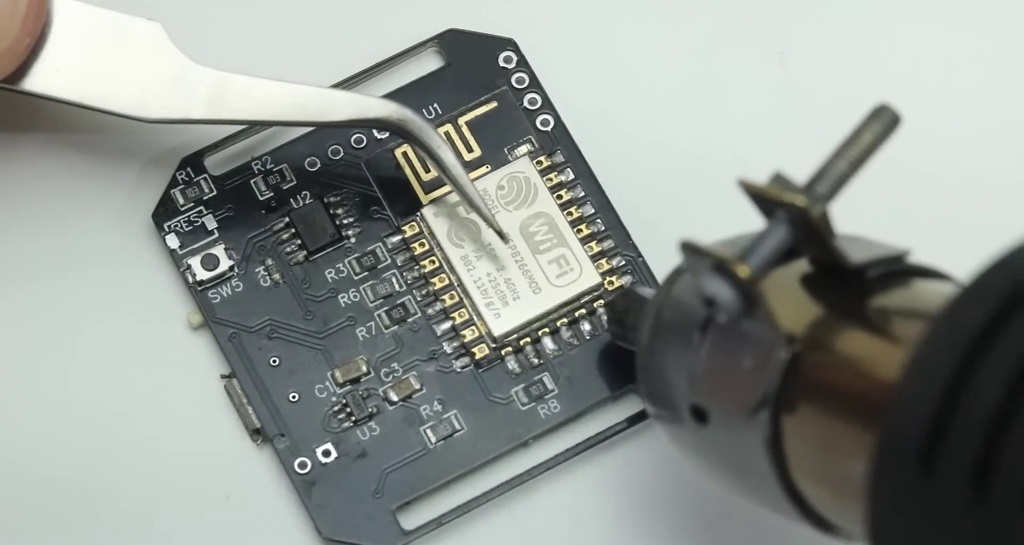
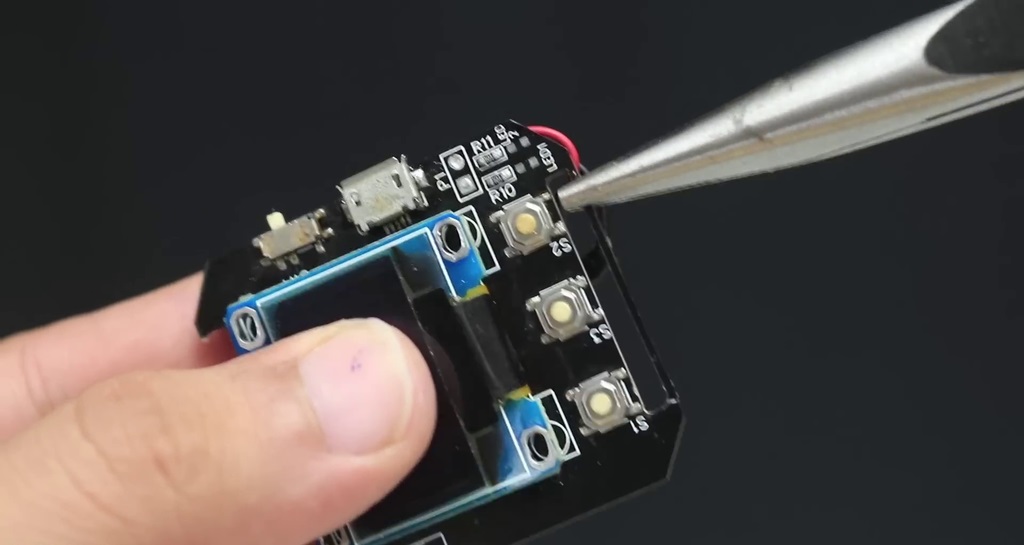
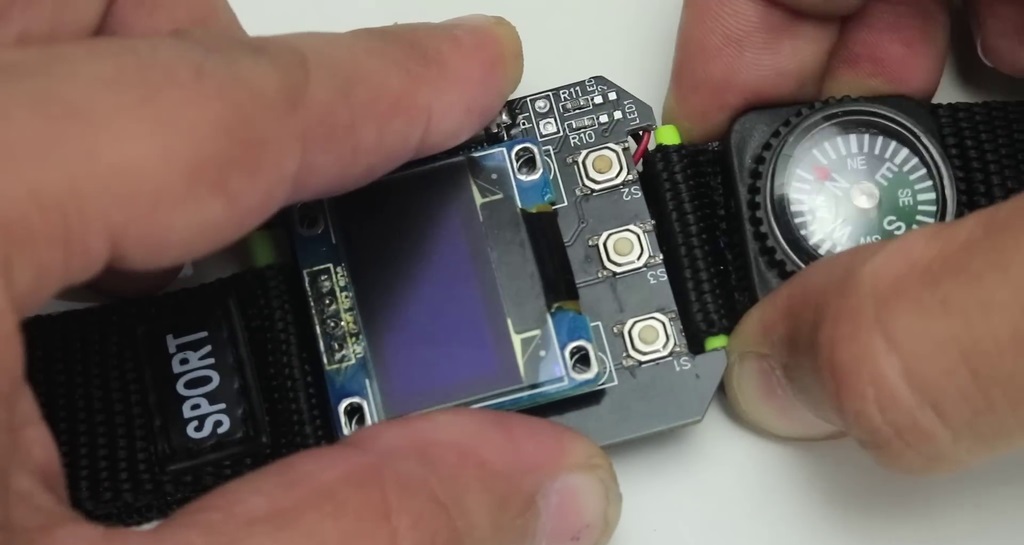
بعد تحضير جميع الأشياء قم بلحام كل مكون من المكونات بلوحة الدوائر المطبوعة (PCB)، وقد استخدمت مسدس اللحام الهوائي للمكونات السطحية (SMD) ومكواة اللحام العادية للمكونات التقليدية (THT)، ولم أواجه أي مشكلة في لحام جميع مكونات SMD باستخدام مكواة اللحام بالهواء الساخن، فإن القيام بذلك ليس بالأمر الصعب على الإطلاق.

خطوة 3 : لحام شريحة ESP12E وشاشة OLED

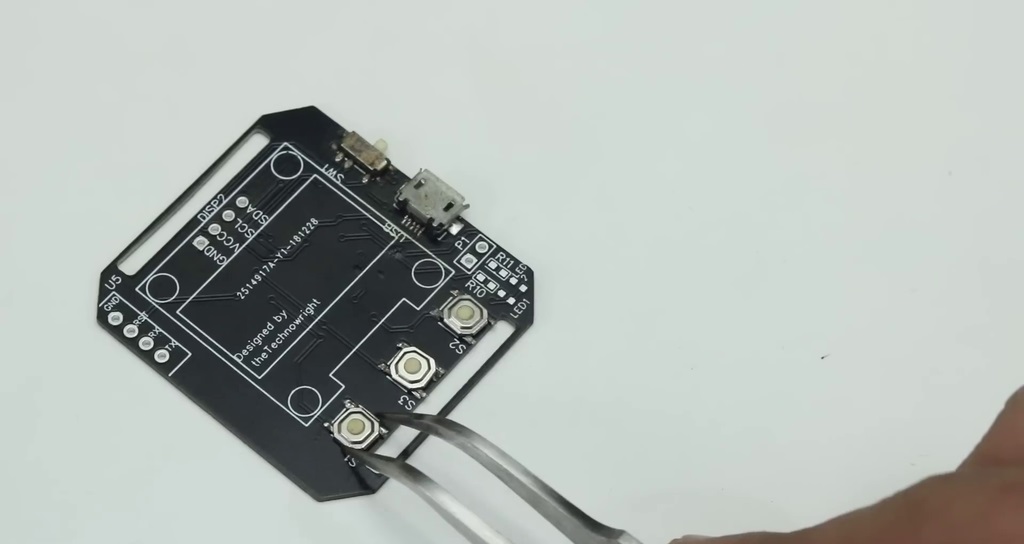
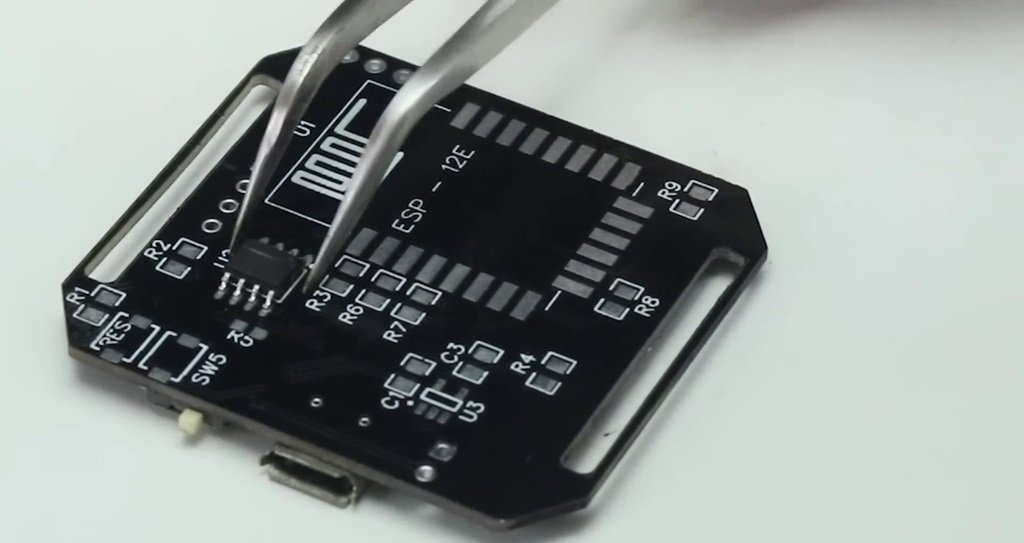
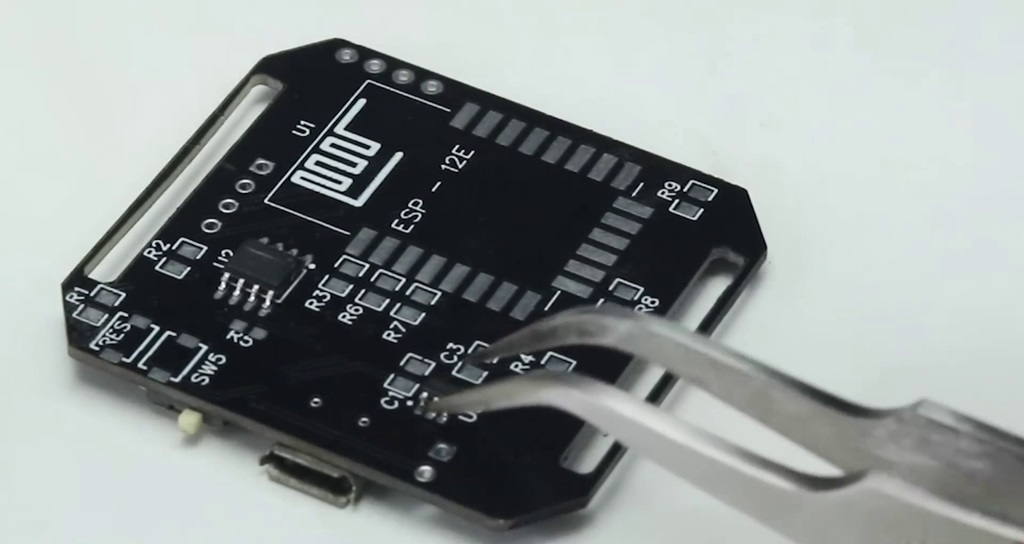
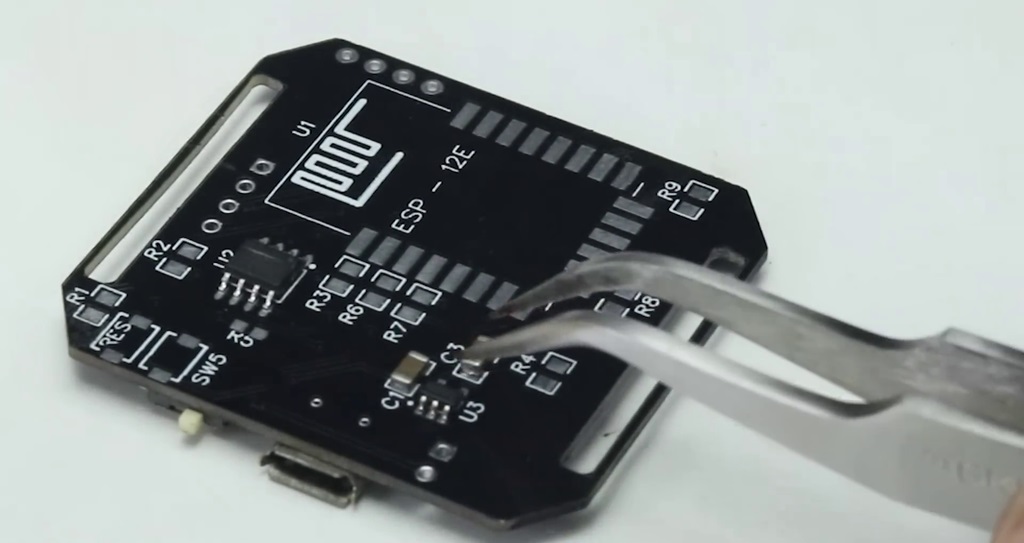
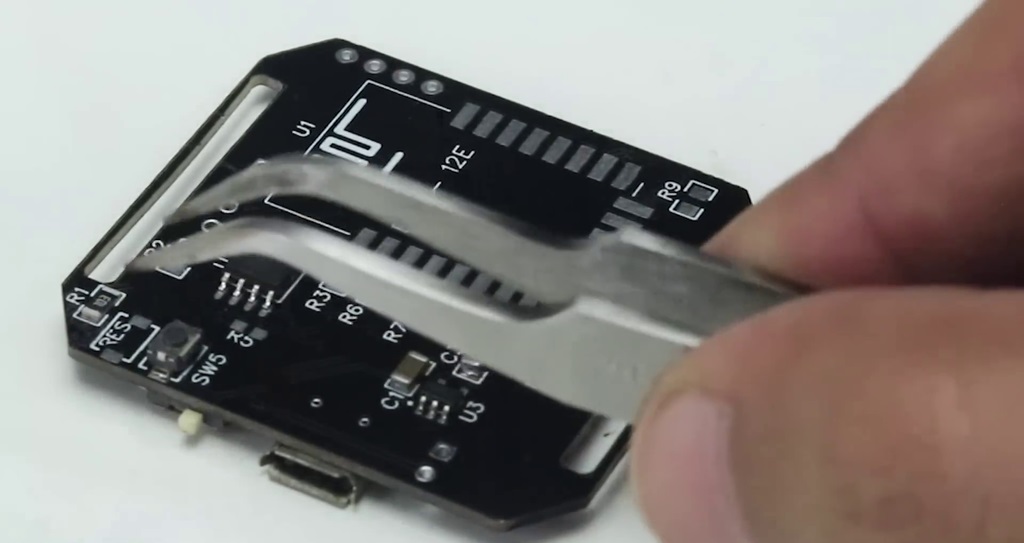
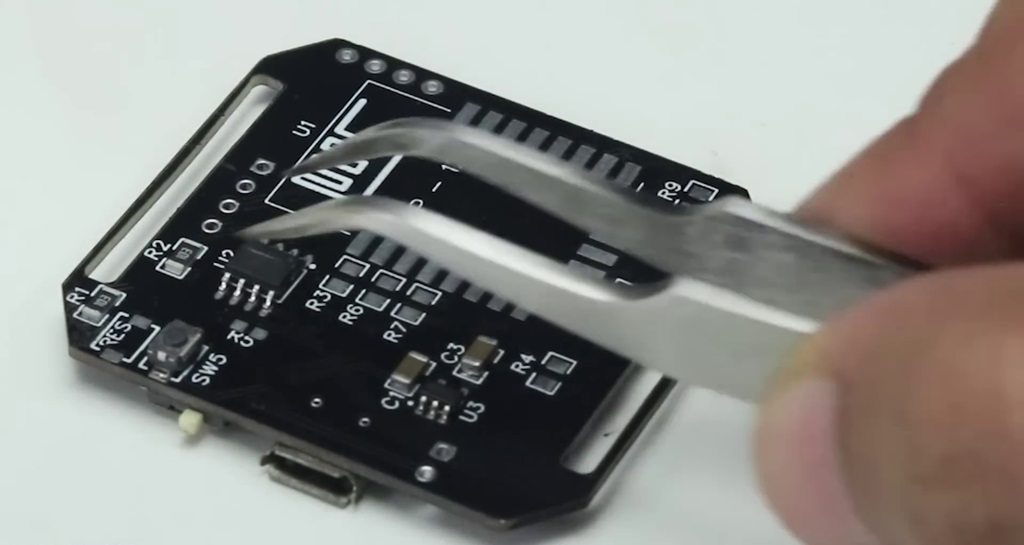
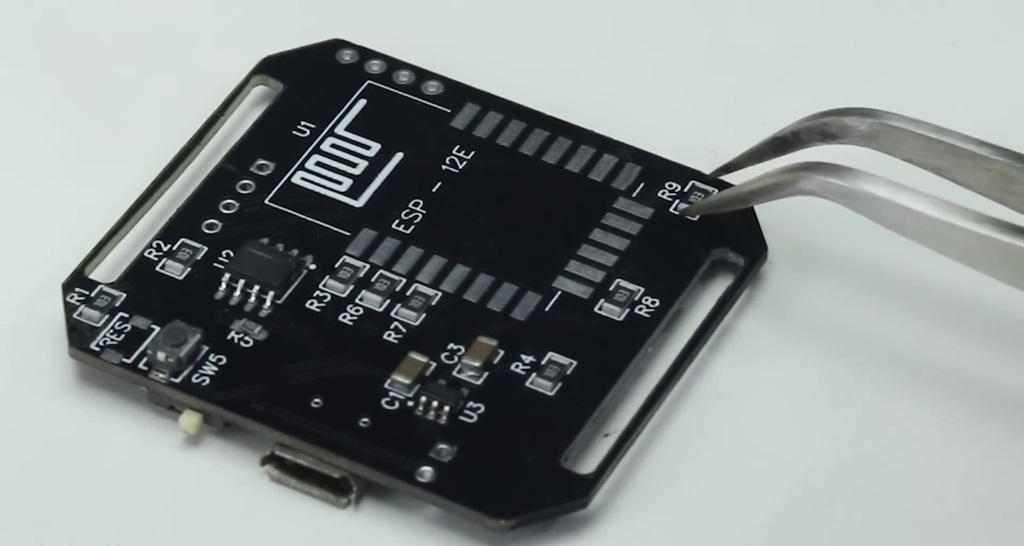
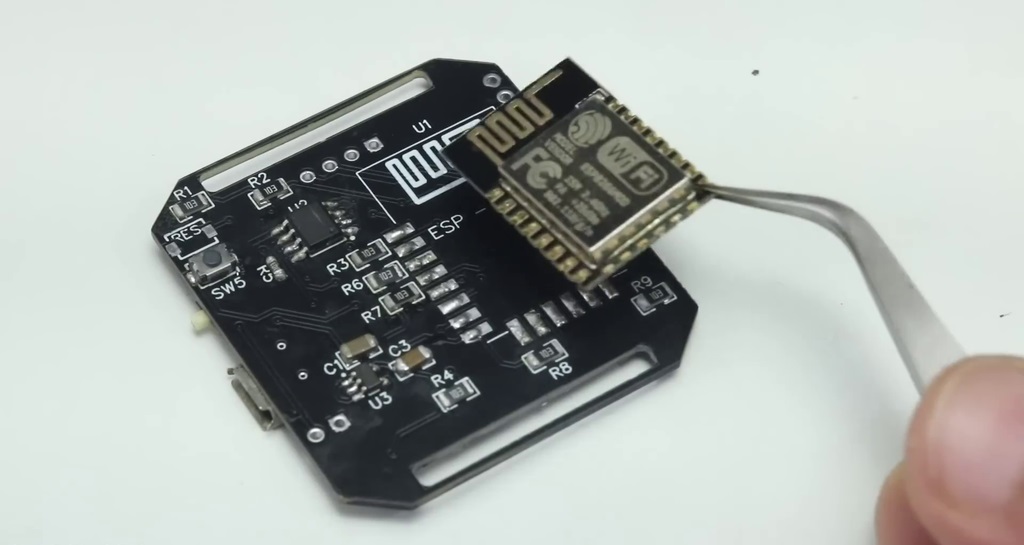
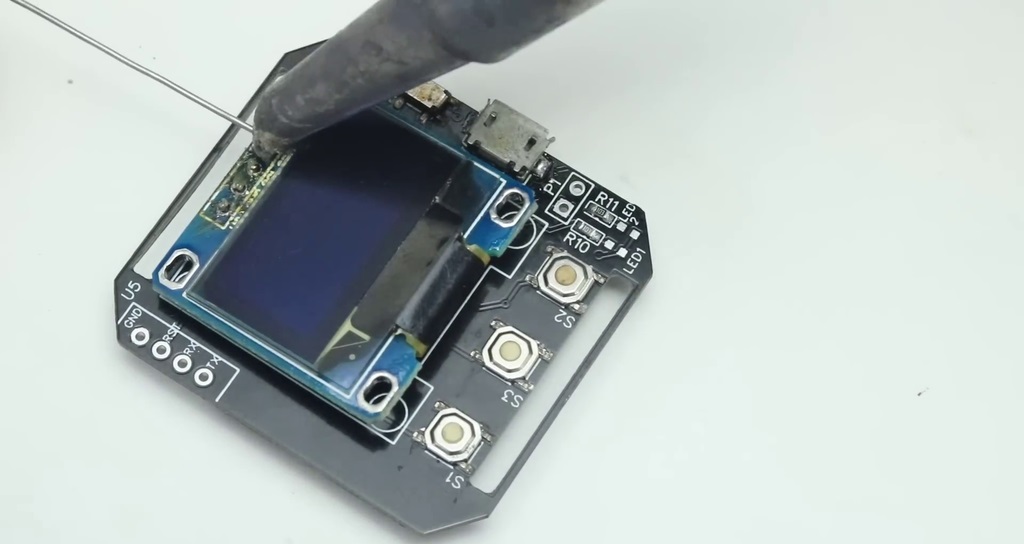
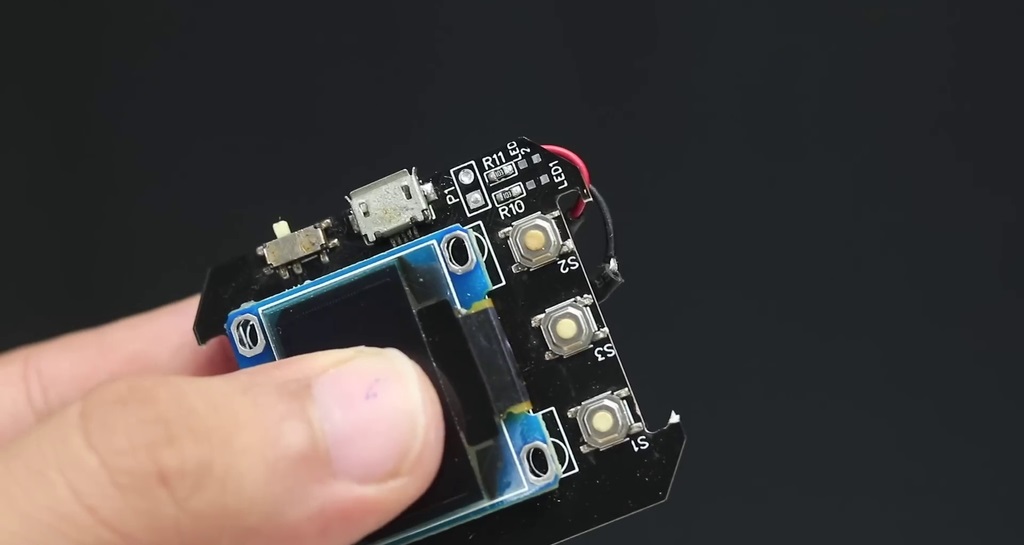
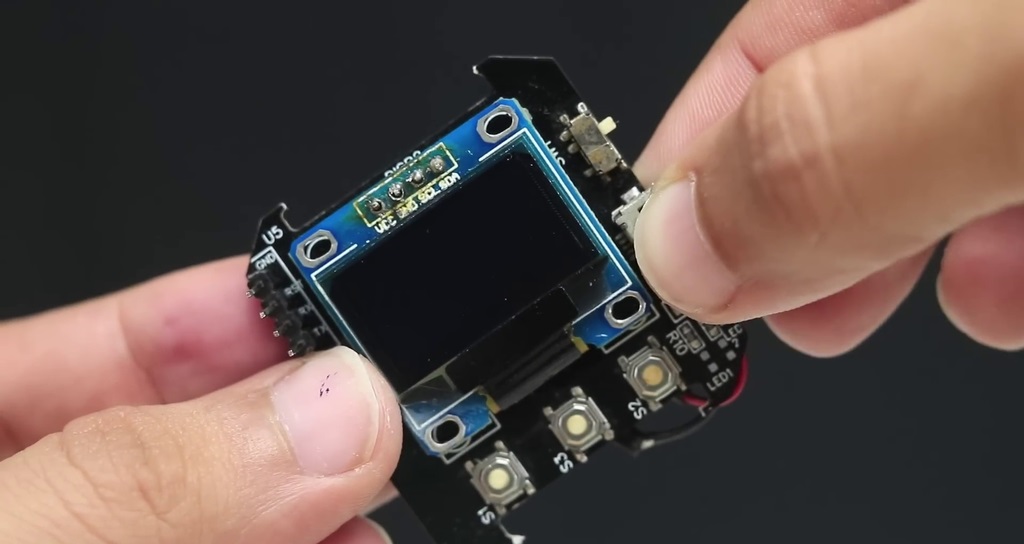
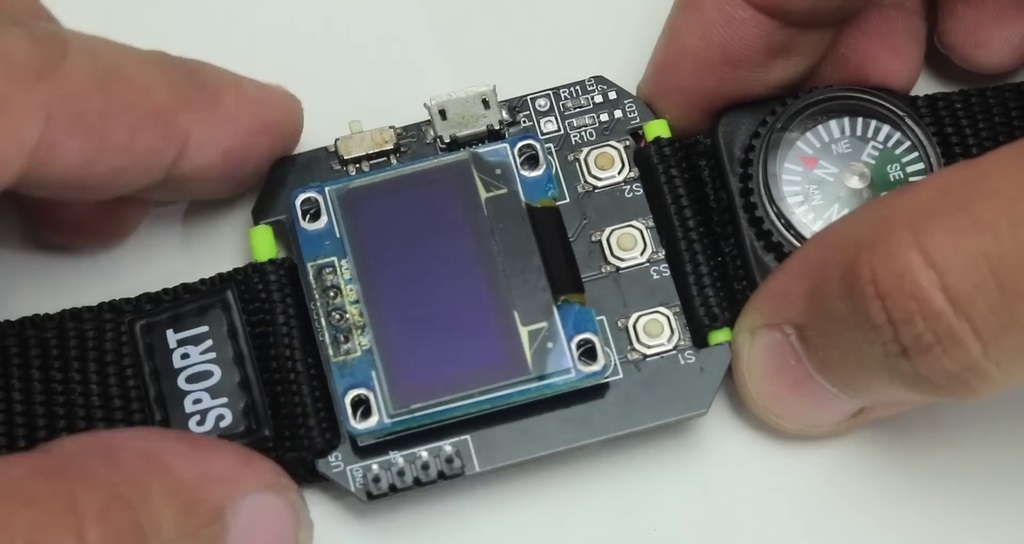
في هذه الخطوة قم بوضع شريحة ESP12E بعناية على اللوحة وقم بلحامها باستخدام المسدس الهوائي، ثم اقلب لوحة الدوائر المطبوعة إلى الجهة الأمامية وضع شاشة OLED وقم بلحامها باستخدام مكواة اللحام.

خطوة 4 : الطاقة

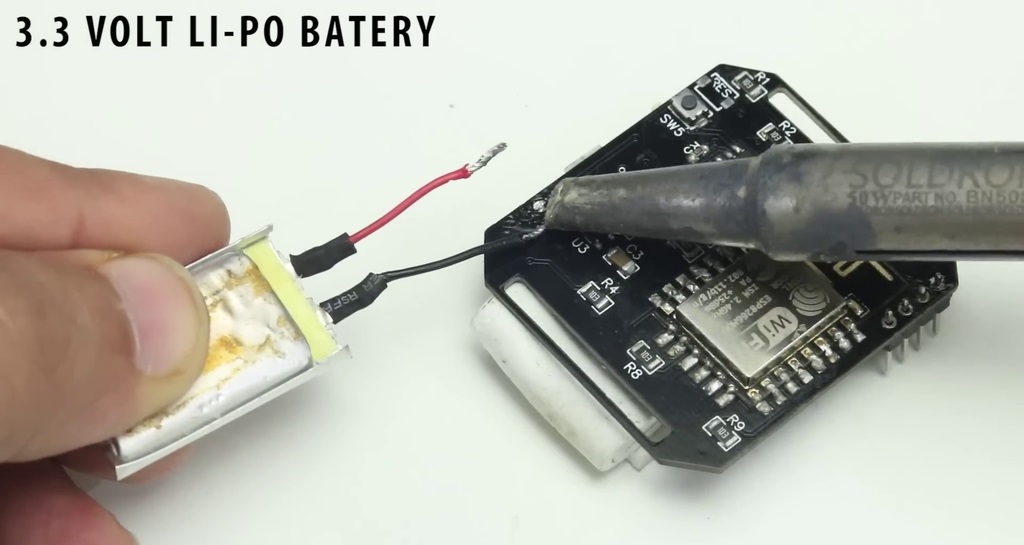
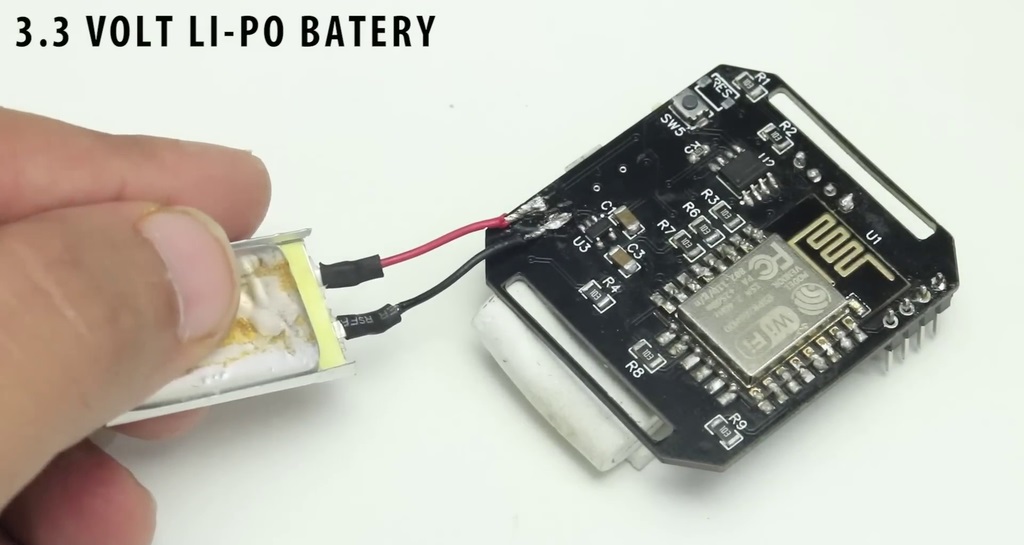
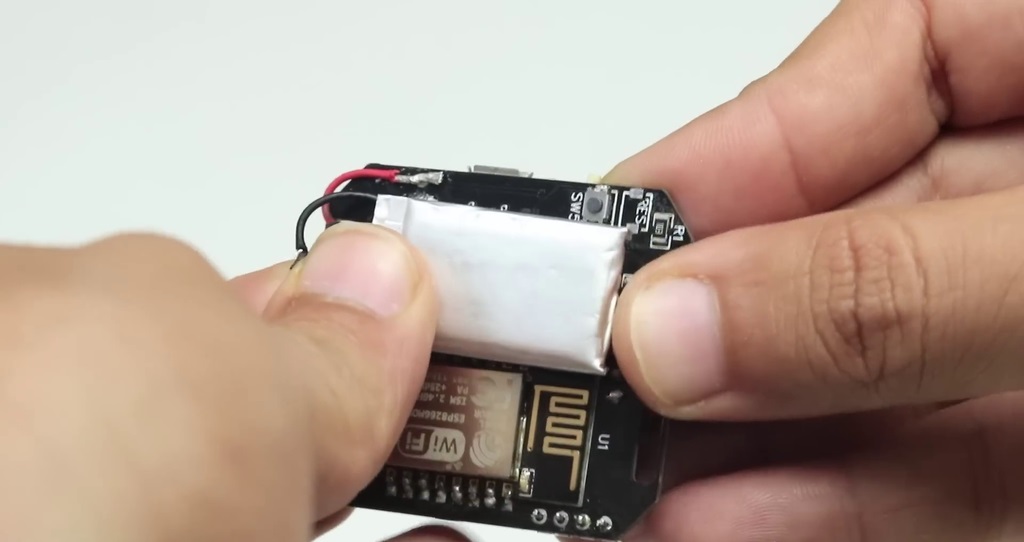
قم بأخذ بطارية الليثيوم 3.3 فولت وقم بلحامها بالطرف الموجب والسالب للوحة الدوائر المطبوعة.

خطوة 5 : قطع الجزء الزائد

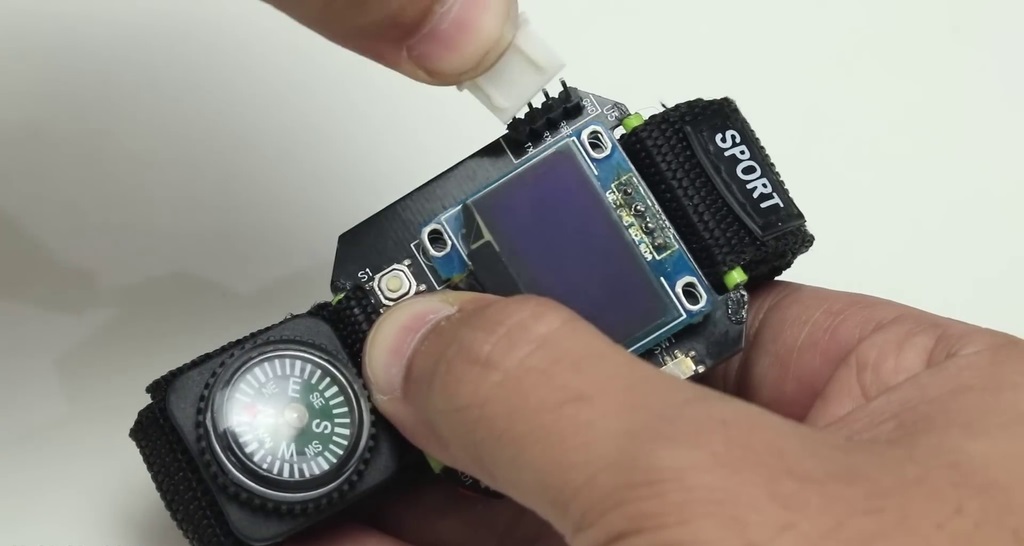
قم بإزالة الجزء الزائد من اللوحة باستخدام أداة القطع.

خطوة 6 : السوار

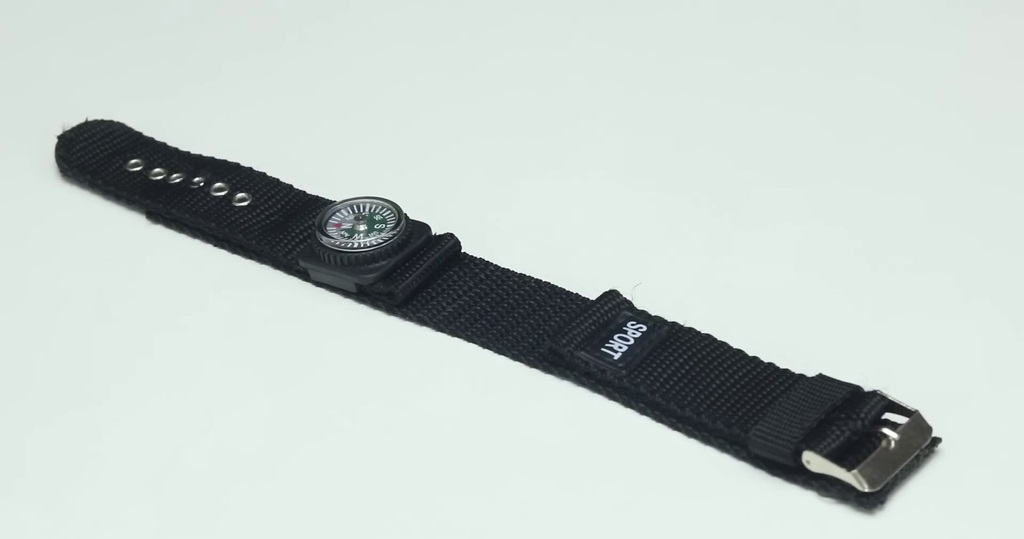
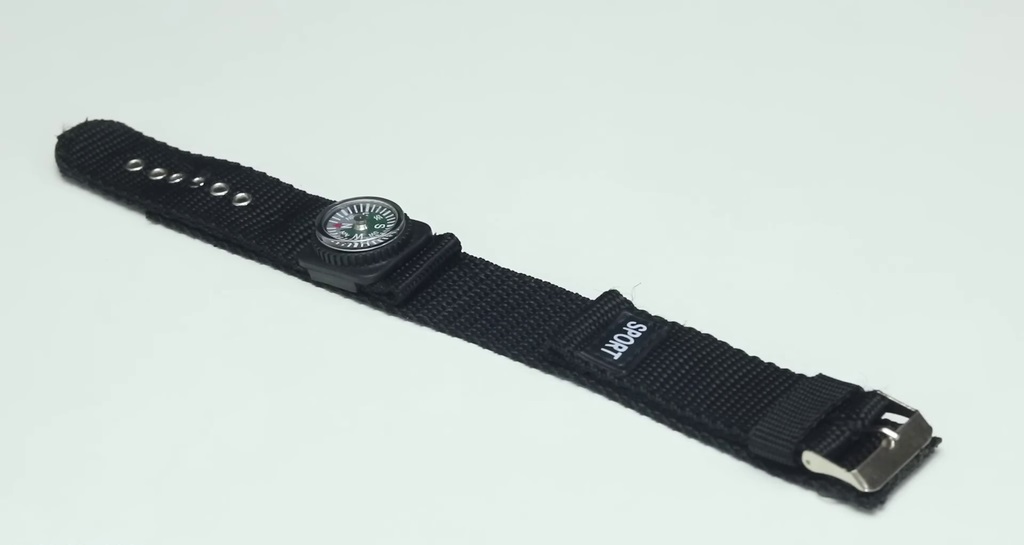
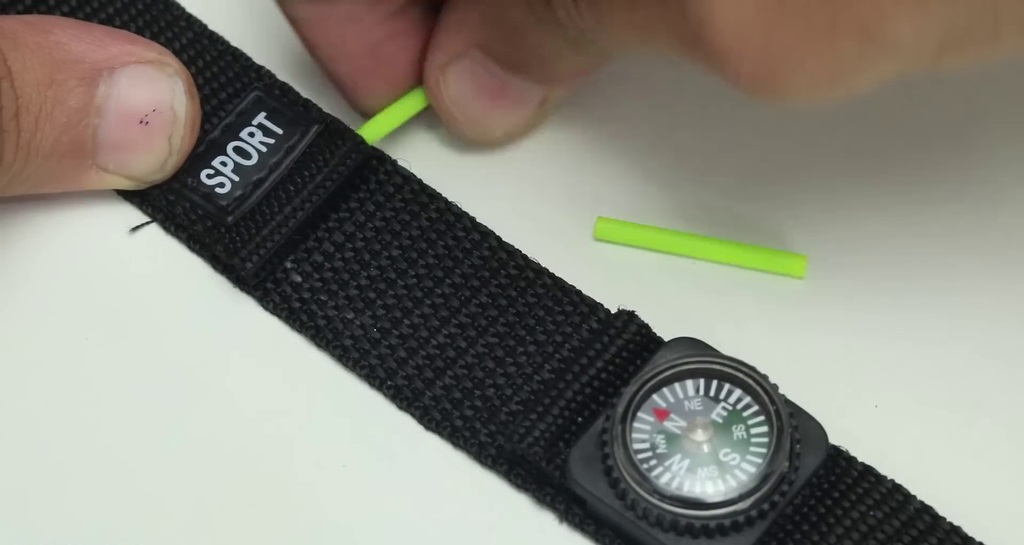
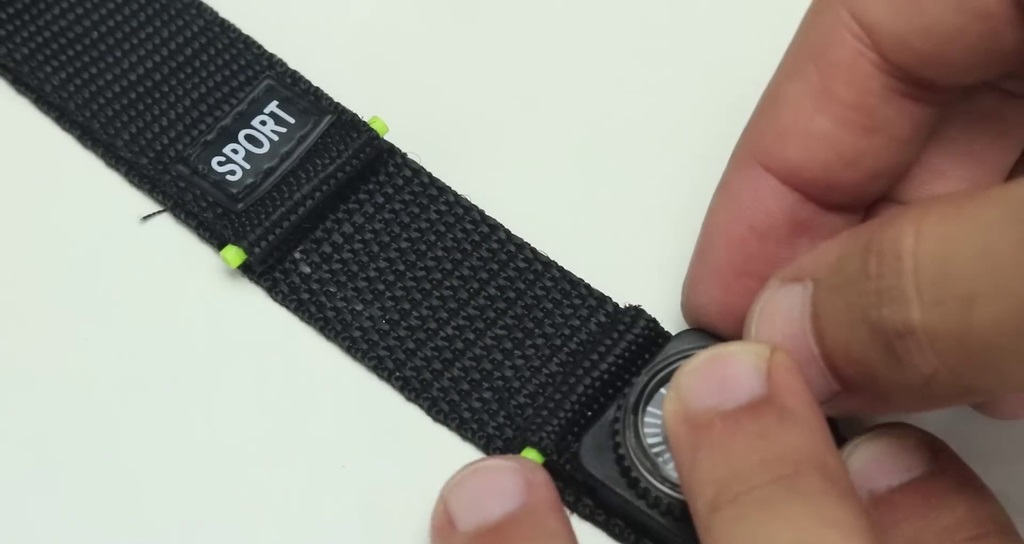
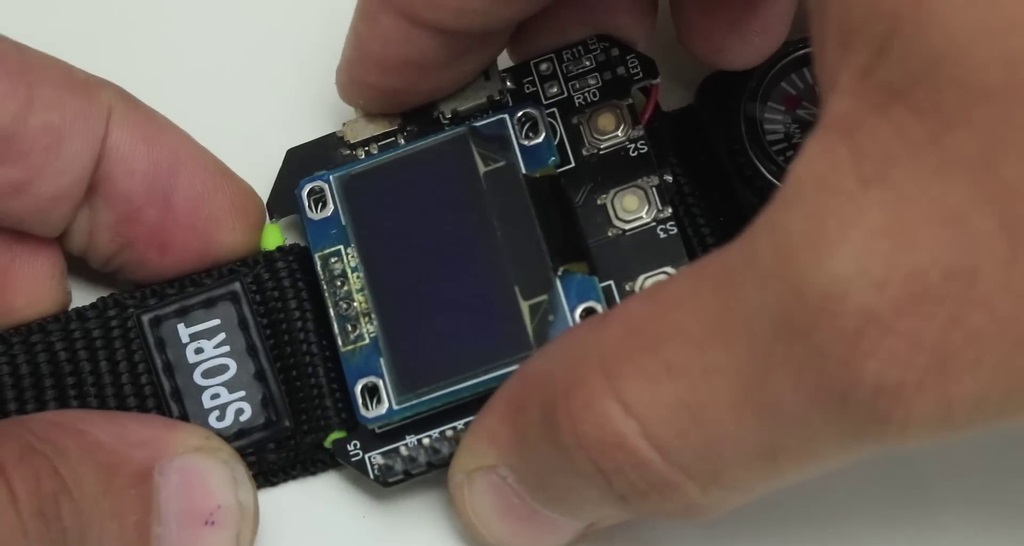
اختر سواراً مناسباً وقم بتثبيته بالساعة.

خطوة 7 : تثبيت البرمجيات

في البداية يجب الحصول على واجهة برمجة تطبيقات الطقس weather API من خلال yahoo weather API قبل تحميل الكود الخاص به، ثم قم بزيارة الموقع الإلكتروني الخاص بهم وانقر على النص الأخضر الموجود أسفل الاستعلام Yql، ثم قم بالتمرير إلى الأسفل حتى ترى النص nome ak، وهنا سوف يظهر اسم المدينة ورمز البلد الخاص بك.

بعد الإنتهاء من ذلك نقوم بالنقر فوق زر "اختبار" أدناه ونقوم بنسخ الرابط المقدم أسفل "نقطة النهاية" من "/v1" حتى الوصول إلى النهاية.

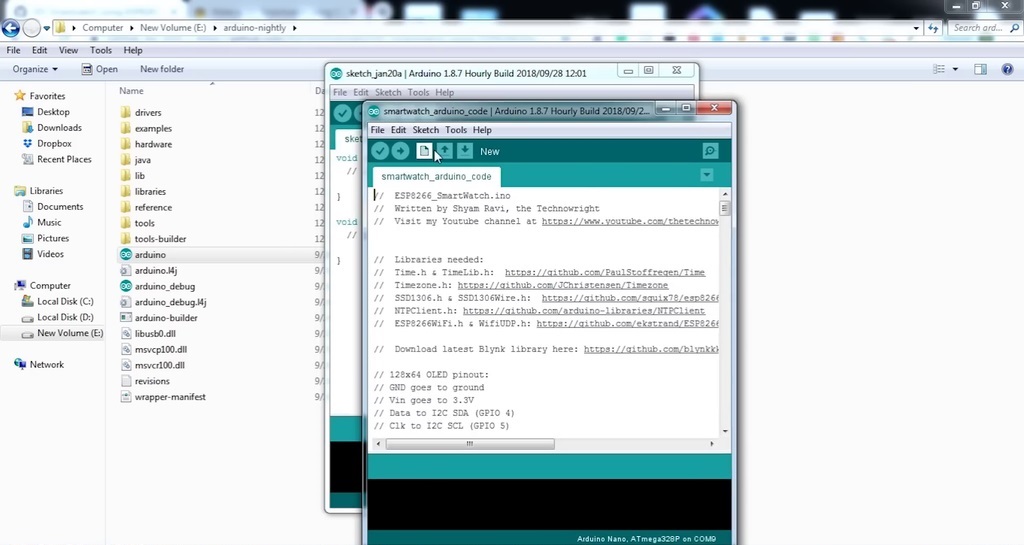
بعد ذلك أدخل كود Arduino كالتالي:

  1. //  ESP8266_SmartWatch.ino
  2. //  Written by Shyam Ravi, the Technowright 
  3. //  Visit my Youtube channel at https://www.youtube.com/thetechnowright 
  4.   
  5.  
  6. //  Libraries needed:
  7. //  Time.h & TimeLib.h:  https://github.com/PaulStoffregen/Time
  8. //  Timezone.h: https://github.com/JChristensen/Timezone
  9. //  SSD1306.h & SSD1306Wire.h:  https://github.com/squix78/esp8266-oled-ssd1306
  10. //  NTPClient.h: https://github.com/arduino-libraries/NTPClient
  11. //  ESP8266WiFi.h & WifiUDP.h: https://github.com/ekstrand/ESP8266wifi
  12.  
  13. //  Download latest Blynk library here: https://github.com/blynkkk/blynk-library/releases/latest
  14.  
  15. // 128x64 OLED pinout:
  16. // GND goes to ground
  17. // Vin goes to 3.3V
  18. // Data to I2C SDA (GPIO 4)
  19. // Clk to I2C SCL (GPIO 5)
  20.  
  21. #include <ESP8266WiFi.h>
  22. #include <WifiUDP.h>
  23. #include <String.h>
  24. #include <Wire.h>
  25. #include <SSD1306.h>
  26. #include <SSD1306Wire.h>
  27. #include <NTPClient.h>
  28. #include <Time.h>
  29. #include <TimeLib.h>
  30. #include <Timezone.h>
  31.  
  32. #define BLYNK_PRINT Serial
  33. #include <BlynkSimpleEsp8266.h>
  34.  
  35. const int DataDisplayButton = 14;
  36. int RelayButtonPin1 = 12;
  37. int RelayButtonPin2 = 13;
  38.  
  39. int Relay1Pin = 2; //Relay pin on the other ESP8266
  40. int Relay2Pin = 0; //Relay pin on the other ESP8266
  41.  
  42. int Relay1State = HIGH;         // the current state of the output pin
  43. int Relay2State = HIGH;         // the current state of the output pin
  44.  
  45. String RlSt = String(Relay1State, HEX);
  46.  
  47. int Relay1ButtonState;             // the current reading from the input pin
  48. int Relay2ButtonState;             // the current reading from the input pin
  49.  
  50. int lastButtonState1 = LOW;   // the previous reading from the input pin
  51. int lastButtonState2 = LOW;   // the previous reading from the input pin
  52.  
  53. // the following variables are unsigned longs because the time, measured in
  54. // milliseconds, will quickly become a bigger number than can be stored in an int.
  55. unsigned long lastDebounceTime1 = 0;  // the last time the output pin was toggled
  56. unsigned long lastDebounceTime2 = 0;  // the last time the output pin was toggled
  57.  
  58. unsigned long debounceDelay1 = 50;    // the debounce time; increase if the output flickers
  59. unsigned long debounceDelay2 = 50;    // the debounce time; increase if the output flickers
  60.  
  61. char auth[] = "XXXXXXXXXXXXXXXXXXXXXXXXXXX"; //Enter your Authentication Token
  62. // Define NTP properties
  63. #define NTP_OFFSET   60 * 60      // In seconds
  64. #define NTP_INTERVAL 60 * 1000    // In miliseconds
  65. #define NTP_ADDRESS  "ir.pool.ntp.org"  // change this to whatever pool is closest (see ntp.org)
  66.  
  67. // Set up the NTP UDP client
  68. WiFiUDP ntpUDP;
  69. NTPClient timeClient(ntpUDP, NTP_ADDRESS, NTP_OFFSET, NTP_INTERVAL);
  70.  
  71. // Create a display object
  72. SSD1306  display(0x3C, 4, 5); //0x3d for the Adafruit 1.3" OLED, 0x3C being the usual address of the OLED
  73.  
  74. const char* ssid = "XXXXX";   // insert your own ssid
  75. const char* password = "XXXXXXXXXXX";              // and password
  76. String date;
  77. String t;
  78. String tempC;
  79. const char * days[] = {"Sunday", "Monday", "Tuesday", "Wednesday", "Thursday", "Friday", "Saturday"} ;
  80. const char * months[] = {"Jan", "Feb", "Mar", "Apr", "May", "June", "July", "Aug", "Sep", "Oct", "Nov", "Dec"} ;
  81. const char * ampm[] = {"AM", "PM"} ;
  82.  
  83. const char hostname[] = "query.yahooapis.com";
  84. const String url = "XXXXXXXXXXXXXXXXXXXXXXXXXXXXXXXXXXXXX"; //put the link to Yahoo Weather API here
  85. const int port = 80;
  86.  
  87. unsigned long timeout = 10000; //ms
  88.  
  89. WiFiClient client;
  90.  
  91. BlynkTimer timer;
  92.  
  93. WidgetBridge bridge1(V1);  // Connect the Relay module
  94.  
  95.  
  96. BLYNK_CONNECTED() {
  97.   // Place the AuthToken of the second hardware here
  98.   bridge1.setAuthToken("XXXXXXXXXXXXXXXXXXXXXXXXXXXXX"); // Enter the Auth token of the relay module(Other Esp8266 Module);
  99. }
  100.  
  101. void setup ()
  102. {
  103.   Serial.begin(115200); // most ESP-01's use 115200 but this could vary
  104.   timeClient.begin();   // Start the NTP UDP client
  105.  
  106.   Wire.pins(4, 5);  // Start the OLED with GPIO 4 and 5 on ESP-01
  107.   Wire.begin(4, 5); // 4=sda, 5=scl
  108.   display.init();
  109.   display.flipScreenVertically();
  110.  
  111.   Blynk.begin(auth, ssid, password, "blynk-cloud.com", 8080);
  112.   // Connect to wifi
  113.   pinMode(DataDisplayButton, INPUT);
  114.  
  115.   
  116.   Serial.println("");
  117.   display.drawString(0, 0, "Connected to WiFi.");
  118.   Serial.print(WiFi.localIP());
  119.   Serial.println("");
  120.   display.drawString(0, 24, "Hi Shyam!");
  121.   display.display();
  122.   delay(1000);
  123. }
  124.  
  125. void loop()
  126. {
  127.   int buttonState = digitalRead(DataDisplayButton);
  128.   if (buttonState == LOW) {
  129.     Serial.print("Button pressed");
  130.     GetWeatherData();
  131.     tellTime();
  132.     delay(6000);
  133.   }
  134.   else {
  135.     display.clear();
  136.   }
  137.   
  138.   Blynk.run();
  139.   timer.run();
  140.   ControlRelays();
  141.   
  142.   display.display();
  143. }
  144.  
  145. void ControlRelays(){
  146.   // read the state of the switch into a local variable:
  147.   int reading1 = digitalRead(RelayButtonPin1);
  148.   int reading2 = digitalRead(RelayButtonPin2);
  149.    
  150.   if(reading1 == LOW || reading2 == LOW){ // Tell the state of the Lights
  151.     display.drawRect(0, 20, 60, 40);
  152.     display.drawRect(61, 20, 60, 40);
  153.     display.setFont(ArialMT_Plain_10);
  154.     display.drawString(17, 3, "Lights");
  155.     display.drawString(84, 3, "A/C");        
  156.     
  157.     if(Relay1State == HIGH){
  158.     display.setFont(ArialMT_Plain_16);
  159.     display.drawString(18, 30, "ON");
  160.     }
  161.     else if(Relay1State == LOW){
  162.     display.setFont(ArialMT_Plain_16);
  163.     display.drawString(15, 30, "OFF");
  164.     } 
  165.     if(Relay2State == HIGH){
  166.     display.setFont(ArialMT_Plain_16);
  167.     display.drawString(78, 30, "ON");
  168.     }
  169.     else if(Relay2State == LOW){
  170.     display.setFont(ArialMT_Plain_16);
  171.     display.drawString(76, 30, "OFF");
  172.     }   
  173.     
  174. }
  175.   // check to see if you just pressed the button
  176.   // (i.e. the input went from LOW to HIGH), and you've waited long enough
  177.   // since the last press to ignore any noise:
  178.  
  179.   // If the switch changed, due to noise or pressing:
  180.   if (reading1 != lastButtonState1) {
  181.     // reset the debouncing timer
  182.     lastDebounceTime1 = millis();
  183.   }
  184.   if (reading2 != lastButtonState2) {
  185.     // reset the debouncing timer
  186.     lastDebounceTime2 = millis();
  187.   }
  188.  
  189.  
  190.   if ((millis() - lastDebounceTime1) > debounceDelay1) {
  191.     // whatever the reading is at, it's been there for longer than the debounce
  192.     // delay, so take it as the actual current state:
  193.  
  194.     // if the button state has changed:
  195.     if (reading1 != Relay1ButtonState) {
  196.       Relay1ButtonState = reading1;
  197.  
  198.       // only toggle the LED if the new button state is HIGH
  199.       if (Relay1ButtonState == HIGH) {
  200.         Relay1State = !Relay1State;
  201.       }
  202.     }
  203.   }
  204.   if ((millis() - lastDebounceTime2) > debounceDelay2) {
  205.     // whatever the reading is at, it's been there for longer than the debounce
  206.     // delay, so take it as the actual current state:
  207.  
  208.     // if the button state has changed:
  209.     if (reading2 != Relay2ButtonState) {
  210.       Relay2ButtonState = reading2;
  211.  
  212.       // only toggle the LED if the new button state is HIGH
  213.       if (Relay2ButtonState == HIGH) {
  214.         Relay2State = !Relay2State;
  215.       }
  216.     }
  217.   }
  218.   // set the LED:
  219.   bridge1.digitalWrite(Relay1Pin, Relay1State);
  220.   bridge1.digitalWrite(Relay2Pin, Relay2State);
  221.   // save the reading. Next time through the loop, it'll be the lastButtonState:
  222.   lastButtonState1 = reading1;
  223.   lastButtonState2 = reading2;
  224. }
  225.  
  226. void tellTime() {
  227.   if (WiFi.status() == WL_CONNECTED) //Check WiFi connection status
  228.   {
  229.     date = "";  // clear the variables
  230.     t = "";
  231.  
  232.     // update the NTP client and get the UNIX UTC timestamp
  233.     timeClient.update();
  234.     unsigned long epochTime =  timeClient.getEpochTime();
  235.  
  236.     // convert received time stamp to time_t object
  237.     time_t local, utc;
  238.     utc = epochTime;
  239.  
  240.     // Then convert the UTC UNIX timestamp to local time
  241.     TimeChangeRule usEDT = {"EDT", Second, Sun, Mar, 2, +150};  //UTC - 5 hours - change this as needed
  242.     TimeChangeRule usEST = {"EST", First, Sun, Nov, 2, +150};   //UTC - 6 hours - change this as needed
  243.     Timezone usEastern(usEDT, usEST);
  244.     local = usEastern.toLocal(utc);
  245.  
  246.     // now format the Time variables into strings with proper names for month, day etc
  247.     date += days[weekday(local) - 1];
  248.     date += ", ";
  249.     date += months[month(local) - 1];
  250.     date += " ";
  251.     date += day(local);
  252.     date += ", ";
  253.     date += year(local);
  254.  
  255.     // format the time to 12-hour format with AM/PM and no seconds
  256.     t += hourFormat12(local);
  257.     t += ":";
  258.     if (minute(local) < 10) // add a zero if minute is under 10
  259.       t += "0";
  260.     t += minute(local);
  261.     t += " ";
  262.     t += ampm[isPM(local)];
  263.  
  264.     // Display the date and time
  265.     Serial.println("");
  266.     Serial.print("Local date: ");
  267.     Serial.print(date);
  268.     Serial.println("");
  269.     Serial.print("Local time: ");
  270.     Serial.print(t);
  271.  
  272.     // print the date and time on the OLED
  273.     display.clear();
  274.     display.setTextAlignment(TEXT_ALIGN_CENTER);
  275.     display.setFont(ArialMT_Plain_24);
  276.     display.drawStringMaxWidth(64, 14, 128, t); // print time on the display
  277.     display.setFont(ArialMT_Plain_10);
  278.     display.drawStringMaxWidth(64, 42, 128, date); // print date on the display
  279.     
  280.     display.drawString(70, 0, "Temp:"); // prints the Temperature from GetWeatherData() function
  281.     display.drawString(100, 0, tempC);  // Replace with "temp" to get temperaute in Farenheit
  282.     display.drawString(113, 0, "C");
  283.     display.display();
  284.   }
  285.   else // attempt to connect to wifi again if disconnected
  286.   {
  287.     display.clear();
  288.     display.drawString(0, 18, "Connecting to Wifi...");
  289.     display.display();
  290.     WiFi.begin(ssid, password);
  291.     display.drawString(0, 32, "Connected.");
  292.     display.display();
  293.   }
  294. }
  295.   void GetWeatherData(){
  296.   
  297.   unsigned long timestamp;
  298.   int temp;
  299.   // Establish TCP connection
  300.   Serial.print("Connecting to ");
  301.   Serial.println(hostname);
  302.   if ( !client.connect(hostname, port) ) {
  303.     Serial.println("Connection failed");
  304.   }
  305.  
  306.   // Send GET request
  307.   String req = "GET " + url + " HTTP/1.1\r\n" + 
  308.                 "Host: " + hostname + "\r\n" +
  309.                 "Connection: close\r\n" +
  310.                 "\r\n";
  311.   client.print(req);
  312.  
  313.   // Wait for response from server
  314.   delay(500);
  315.   timestamp = millis();
  316.   while ( !client.available() && (millis() < timestamp + timeout) ) {
  317.     delay(1);
  318.   }
  319.  
  320.   // Parse temperature
  321.   if ( client.find("temp\":") ) {
  322.     temp = client.parseInt();
  323.     tempC = (temp - 32) * 5/9 ;
  324.     Serial.print("Local temperature: ");
  325.     Serial.print(tempC);
  326.     Serial.println("°C");
  327.   }
  328.  
  329.   // Flush receive buffer
  330.   while ( client.available() ) {
  331.     client.readStringUntil('\r');
  332.   }
  333.  
  334.   // Close TCP connection
  335.   client.stop();
  336.   Serial.println();
  337.   Serial.println("Connection closed");
  338.   }

ثم أدخل رمز مصادقة Blynk والذي ستحصل عليه عبر البريد الإلكتروني بعد إنشاءد مشروع Blynk جديد أولاً في الكود، ثم أدخل بيانات شبكة WiFi وكلمة المرور.

ويجب استبدال رابط "const String" برابط واجهة برمجة تطبيقات ياهو الذي قمت بنسخه "Yahoo API"، ثم أدخل رمز المصادقة الخاص بوحدة ESP8266 الأخرى التي تدير المرحلات من ضمن blynk-connected بعد ذلك، وفي القسم الأخير قم بالتمرير لأسفل حتى تجد قاعدة ضبط الوقت "TimeChangeRule" وهنا اضبط توقيت UTC وفقًا لمنطقتك الزمنية.

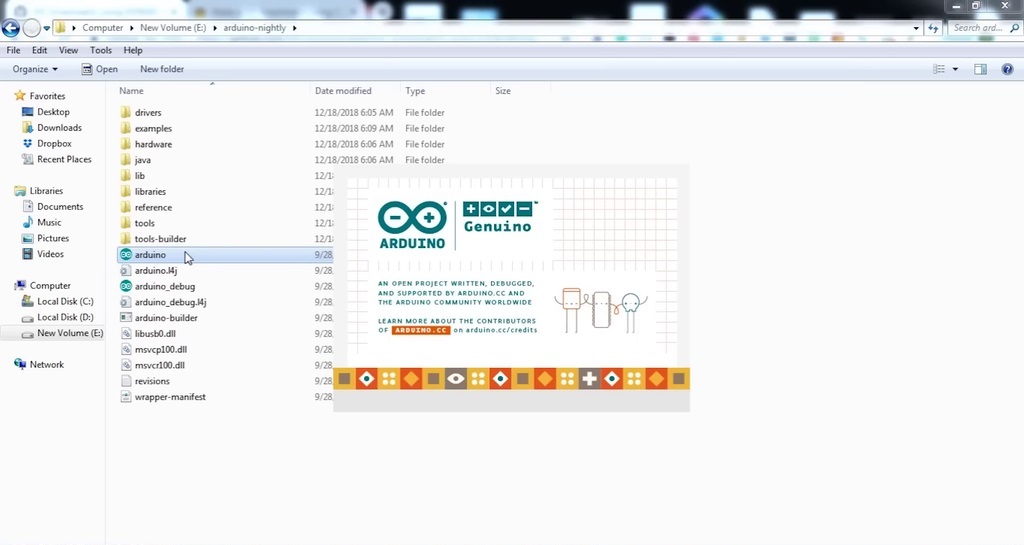
ثم قم بتثبيت كل مكتبات arduino التالية:

Time.h & TimeLib.h

Timezone.h

SSD1306.h & SSD1306Wire.h

NTPClient.h

ESP8266WiFi.h & WifiUDP.h

وقم بتنزيل أحدث مكتبة Blynk هنــا.

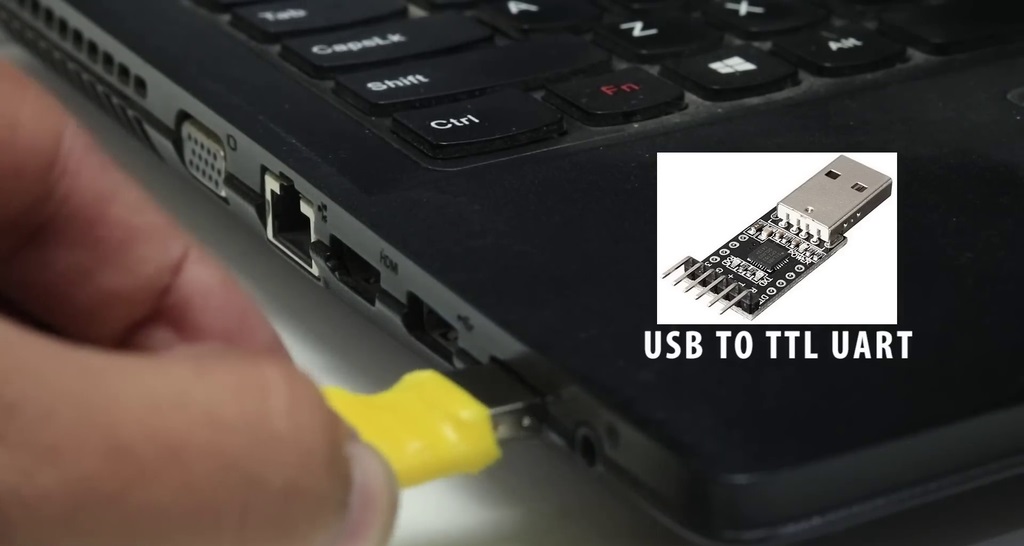
الآن قم بتوصيل جهاز الاتصال التسلسلي ذو 4 سنون بمحول USB-TTL وفقًا لذلك:

محول ESP-12eUSB-TTL

GND - GND

RST - RTS

RX - TXD

TX - RXD

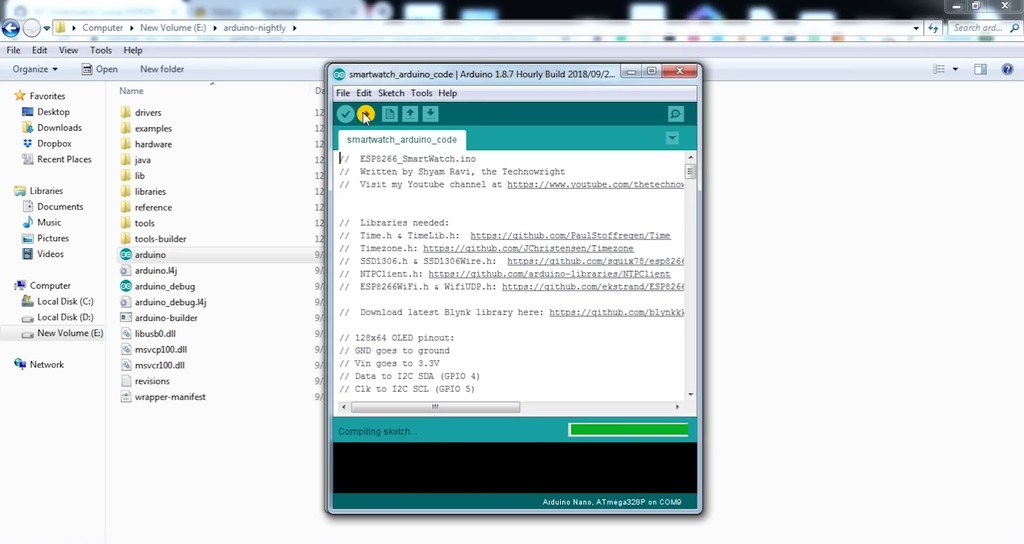
وفي بيئة التطوير المتكاملة لأردوينو "Arduino IDE" قم بتحديد جهازك NodeMCU 1.0 ثم اختر منفذ COM الصحيح وقم بتحميل الكود، وأثناء تحميل الكود يجب التأكد من الضغط مع الاستمرار على زر الفلاش الموجود على الساعة.

خطوة 8 : التشغيل

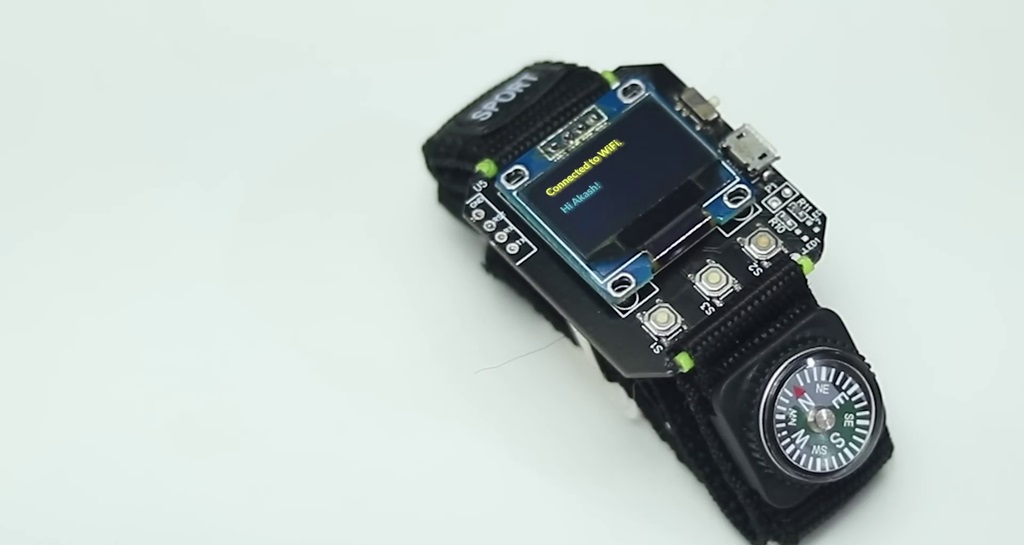
الآن قم بتحريك المفتاح الانزلاقي لتشغيل ساعتك، ويجب أن يظهر إشعار يفيد أنك متصل بشبكة الواي فاي، فإذا ظهر ذلك الإشعار فقد نجحت عملية تشغيل ساعتك الذكية.

وظائف الأزرار:

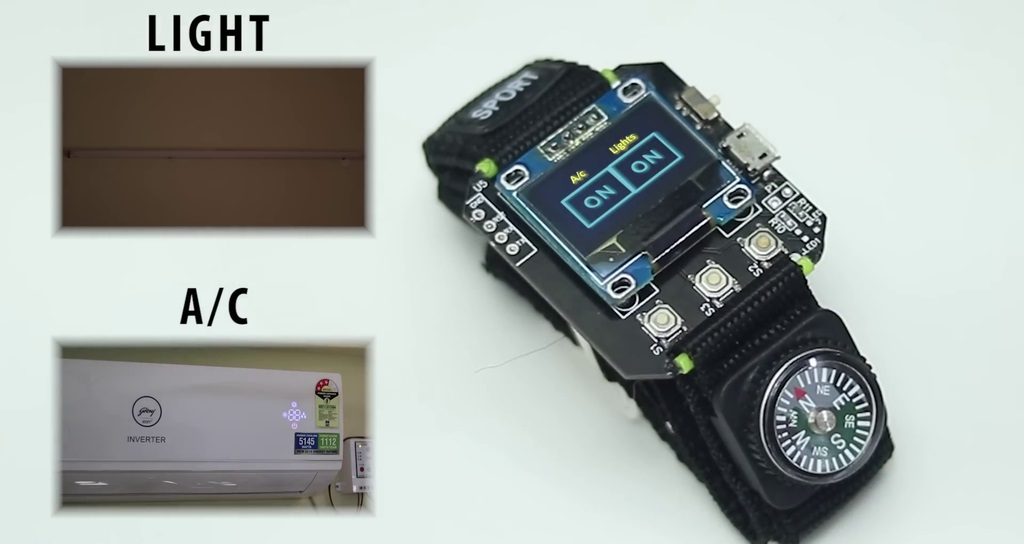
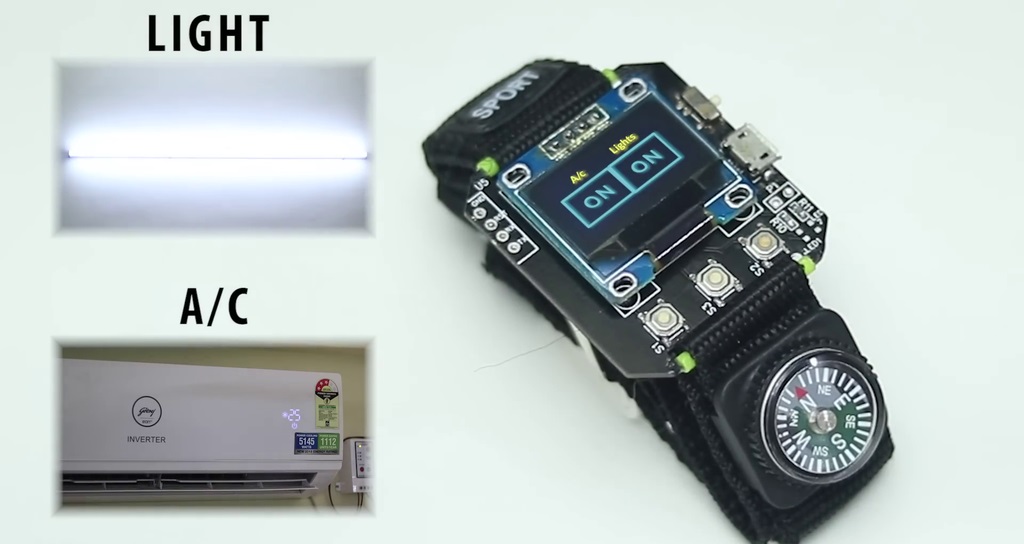
عند الضغط على الزر الأوسط تظهر لك الساعة درجة الحرارة والوقت والتاريخ، ويتم التحكم في مرحلي وحدة wifi relay بواسطة الزرين الآخرين، ويمكن تشغيل أي عنصر كهربائي متصل بالريلاي عن طريق الساعة، وقم بتوصيلها بمقبس طاقة ممتد للحصول على أفضل أداء، بالإضافة إلى ذلك، تأكد من أن مفتاح الترحيل متصل بالسلك الحامل للتيار وليس بالمحايد.

خطوة 9 : طلب لوحات دوائر مطبوعة PCB

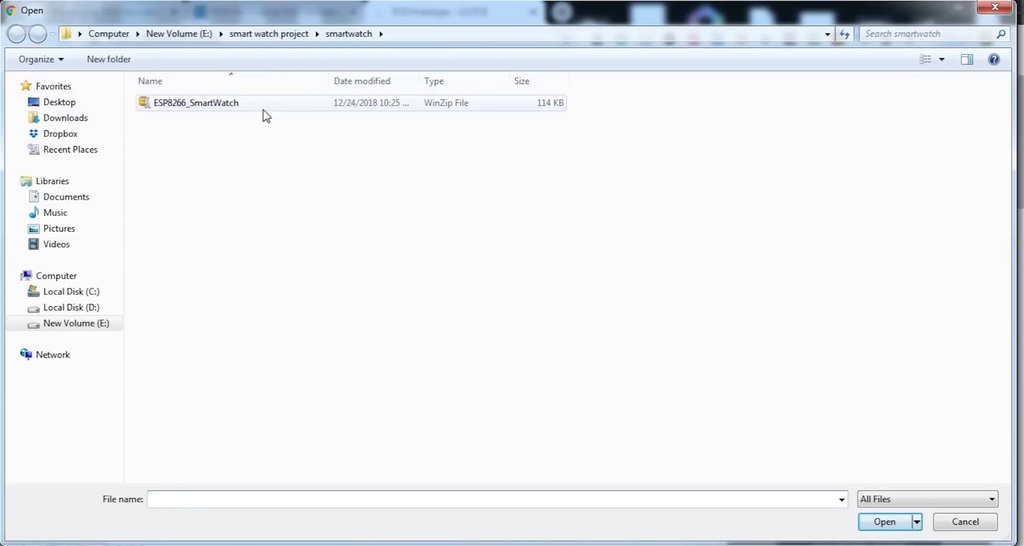
قم بزيارة موقع www.jlcpcb.com ثم أرسل ملف Gerber الخاص بك لتقديم طلب لشراء لوحات دوائر مطبوعة PCB خاصة لمشروعك.

لا توجد تعليقات حتي الآن.
تسجيل الدخول مطلوب

يجب عليك تسجيل الدخول لإضافة تعليق.

تسجيل الدخول